
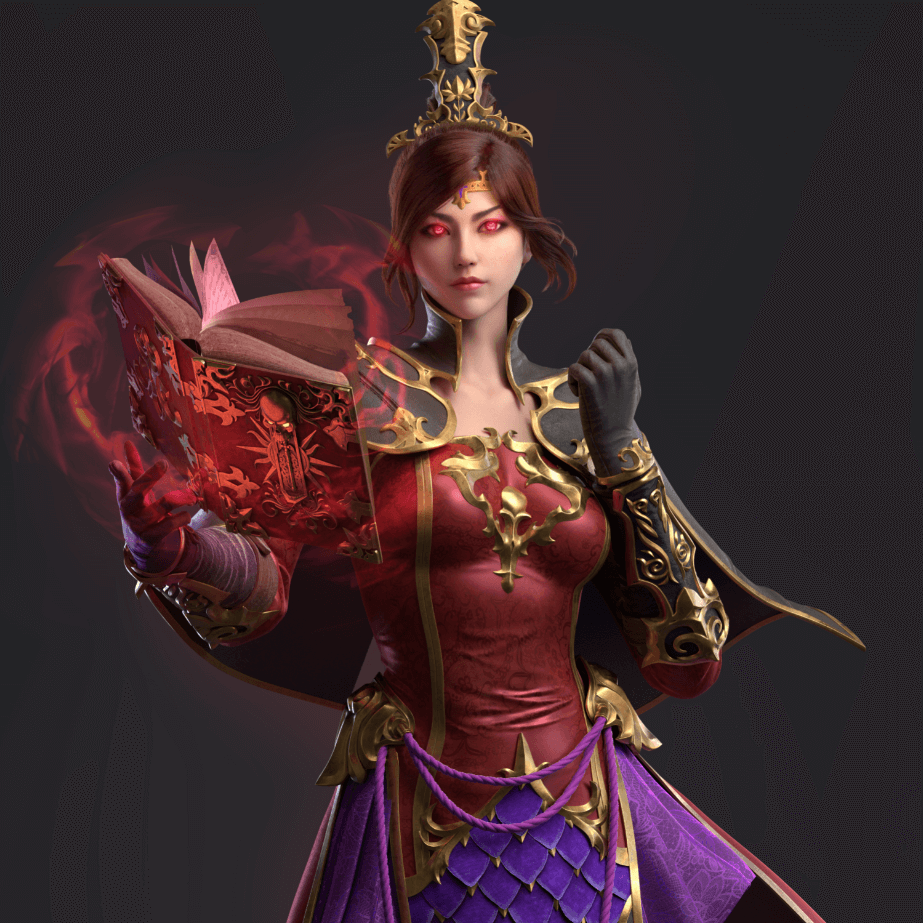
How I created Chinese Magician the character
Editor: Sian
This character is created by Weilin Hu under instruction from Huifeng Huang. Weilin shares with us his production process and experience on creating this character. Let’s see what he said!
Hi,I’m Weilin. I currently work in an animation company as a 3d character artist.I enter this industry back in 2016.I’ve done CG animation character for Glory of King and poster character for Moonlight Blade.
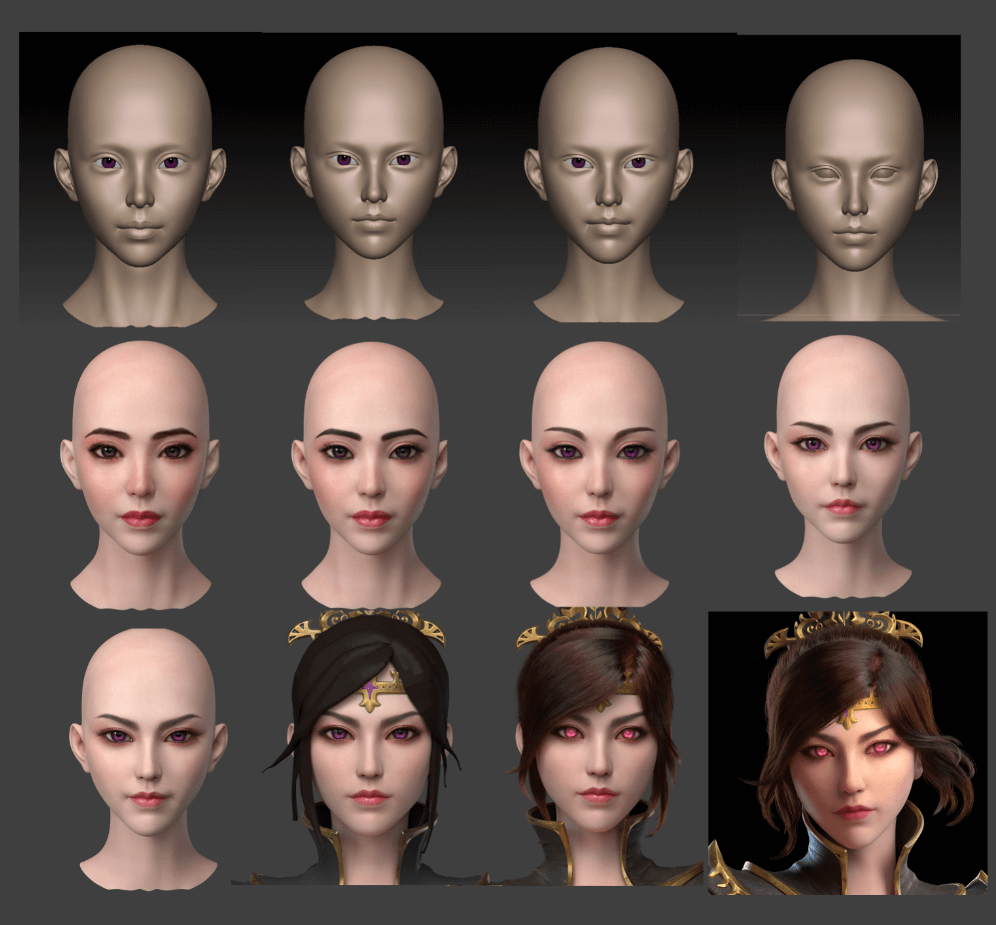
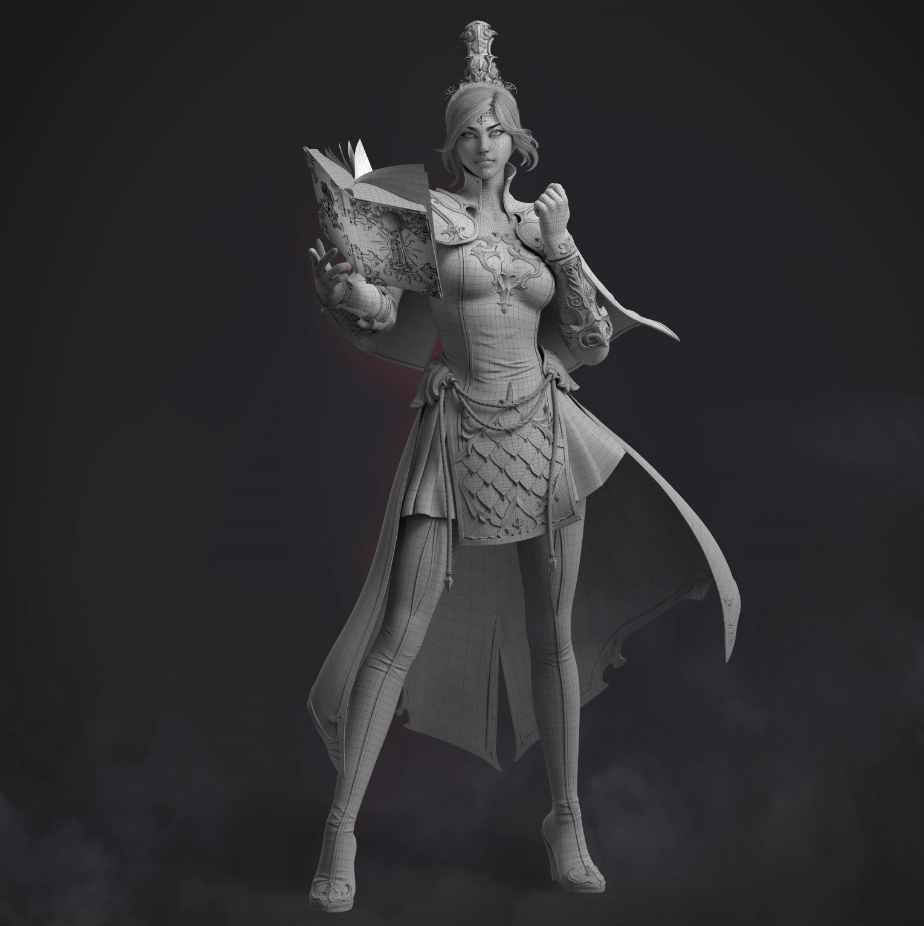
I started making the body part from basic grid,which helps me to locate eyes, mouth, height and set the proportion so that I could pose the character in T-pose. The head is sculpted and refined in Zbrush. I put it back to the body after finishing sculpting.
For the equipments, because many of equipments on the body are the same, I used symmetry method on it. As for the golden biding of the clothes, I integrated it so that there won’t be fault on the junction. I always do it this way.And I manually pose the book and the ropes.
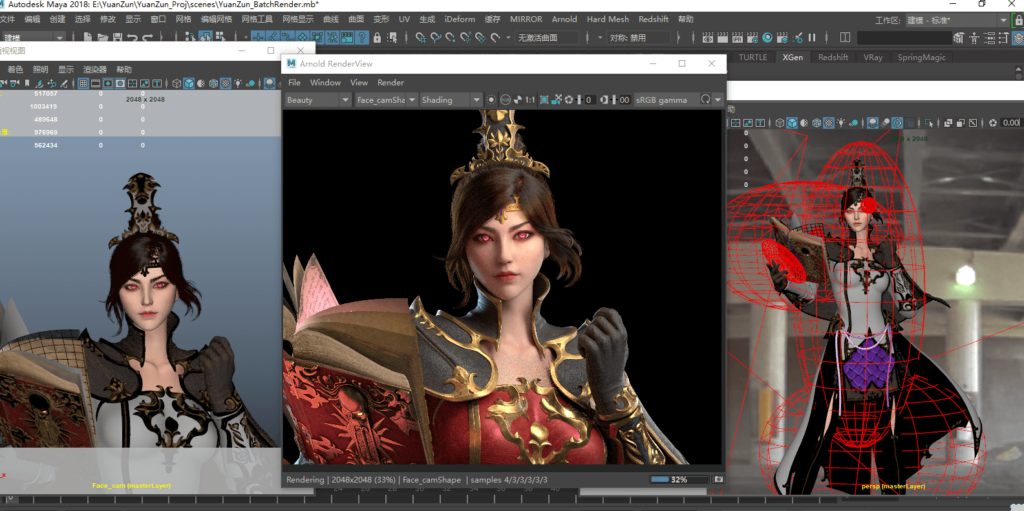
After setting up the body and equipment, I used Transpose to pose the body and put on the equipment on Maya. The top and the dress were made separately. I made the general shape on Marvelous Designer and added the pleats on Zbrush.
Making the hair was an interesting process for me. First I need to decide the hairstyle and shape, and then output it to Maya from hairstyle grid. I divided the hairstyle into 3 sections, hair blowing on the front, hair on the middle section, and hair on the back. I used curve tool to draw curves on these three sections and refined it after turning it into guide curves in Xgen.
The head and body part mapping are displacement texture and basic texture I projected from other parts on Mari. After doing the facial make up, I put the displacement mapping I just projected into Zbrush to refine head high poly. And I used Substance Painter, which has a lot of preinstalled material, to make the equipment and clothes
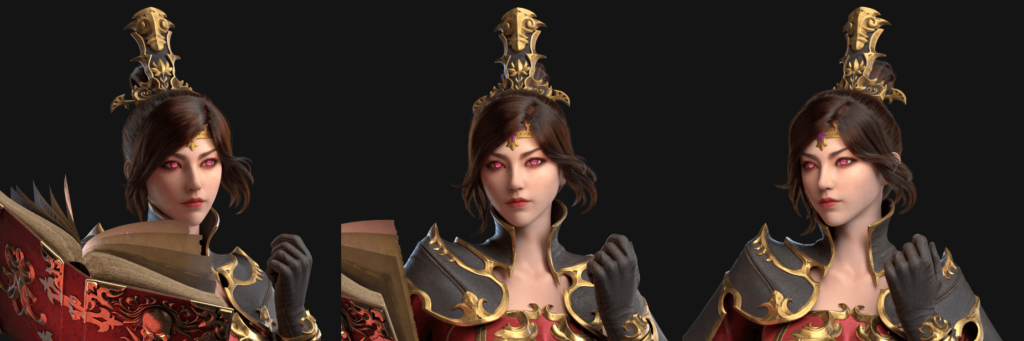
As for lighting, I used three-point lighting. I put a main light on the top right-hand corner to light up the face,and two contour lights on rear left and rear right. Then I use Maya and Arnold for rendering. Composition is completed in photoshop. I made lighting and color correction there.
The most difficult part of doing this project is keeping on finishing it, especially the head, which is a real challenge for me. I revised it so many times. If you encounter same difficulties like me, maybe you could stop it to do something else, and come back to it after a while. As people have different experiencea,people may have different ways of making art and different way of learning. For me, I would practice something that I’m bad at and watch tutorials when I’m free, so that I could improve my production efficiency more quickly.
Thanks Weilin for sharing it with us. And thank you guys for reading! If you are looking for having fun with your CG peers, welcome to join our discord server!:https://discord.com/invite/2NzvDes


Post a Comment
要发表评论,您必须先登录。
Pingback: How I created Chinese Magician the character | ...
2021-12-22