How to Add Textures in Blender3.0
Beginners to blender often use the terms “material” and “texture” interchangeably because they both change the appearance of an object. Technically, however, a texture is just an image or pattern, while a material is a collection of information that defines an object’s color, gloss, transparency, and bumpiness.
In Blender, materials are composed of image textures. A single material can contain multiple textures that change the overall appearance of the material, and an object can have multiple materials assigned to different parts. The main advantage of using image textures is the ability to make simple objects (such as geometric planes) look like more complex objects (such as wooden floors).
Texture models have many applications. Whether it’s 3D animation, 3D video games, or 3D visual effects, learning how to texture models is an essential skill for 3D artists. If you want to showcase your models, textures will make them unique.
In this article, we’ll show you how to do just that, and as we do, we’ll also introduce you to some of the latest features in Blender 3.0. Let’s start texturing!
Using image textures in Blender 3.0 is easier than ever. You only need two things:
1.An image file that Blender supports saved to your computer
2.An object that will use the material that contains the texture
We’ll use an image texture for our default material, another image texture for a new material, and the default cube as our object.
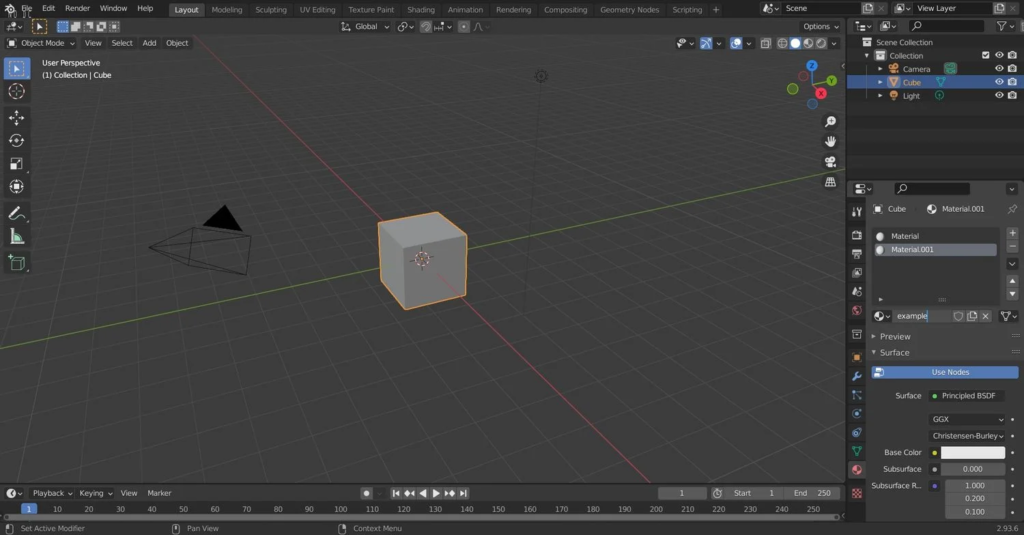
Step 1: Create a New Material
Before you can add texture, you’ll need to assign a material to the object. Follow the steps below:
Left-click on the cube and select Materials (the sphere icon located in the bottom right corner).
Click the plus icon (+) to add a new material.
Rename the material. For this example, we will name ours “example”.
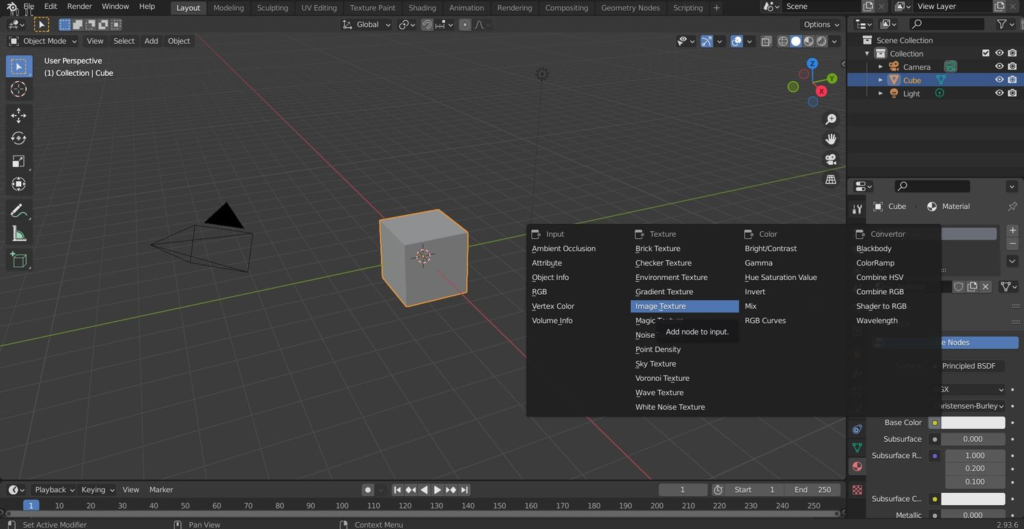
Step 2: Import and Apply the Texture
Follow these steps to apply the image texture to the object:
In the Materials tab, locate Base Color and click on the small yellow dot next to it.
Select Image Texture.
Click on Open and locate the texture file you’ve downloaded earlier to import it.
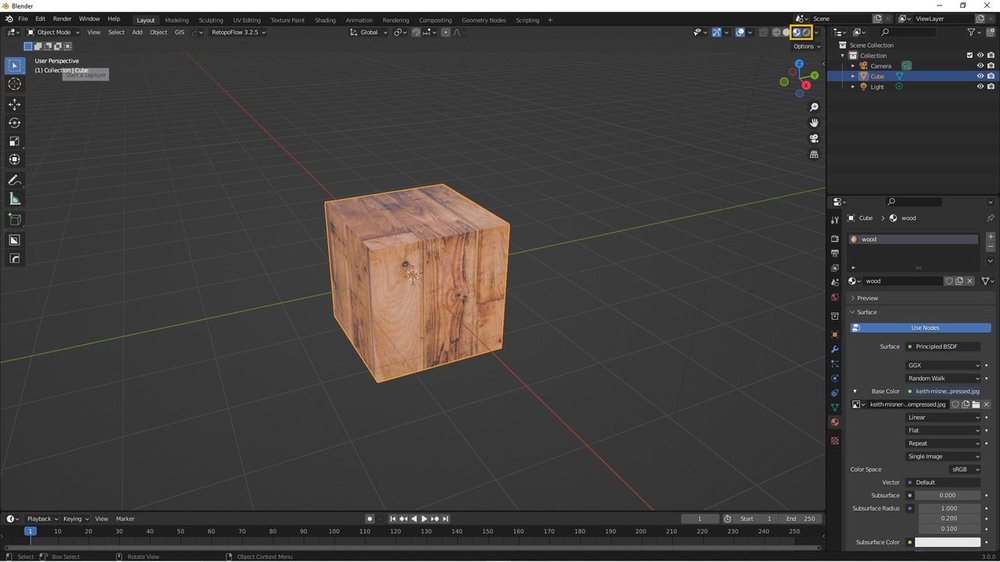
After importing, you may notice that the object still looks the same. To view the changes, you’ll need to enable Material Preview mode in the viewport; click on the sphere located at the top right-hand corner of the viewport. Selecting Display Render Preview mode also lets you see the texture.
Step 3: Unwrap the Object
Want more control over the appearance? You can do that by telling Blender how to map the texture to the faces of the object. To do this requires UV mapping,Unwrapping an object is the process of taking the 3D form and converting it to a 2D shape. To get a good, uniform UV that doesn’t overlap, you can follow these steps:
Click on the “UV Editing” workspace button on the Topbar (outlined in yellow in the screenshot above).
Hover over the 3D Viewport and press the Tab key to switch to Edit mode.
Press the ‘2’ key on the top row of the keyboard, not the on the number pad. This allows us to select edges.
Select the edges that you want to form the seam where the 2D shape of the object is separated. The seam should be placed in an area that won’t be as visible as the rest of the model because seams are visible with some textures.
Right-click on the 3D viewport and click “Mark Seam”.
Hover over the 3D viewport and press the ‘U’ key, then click “Unwrap”.
In the UV editor, you’ll now see the unwrapped version of your object. You have the option of selecting vertices, edges, faces, or UV islands by clicking on the “Vertex Selection Mode” icons on the left side of the Header just below the Topbar
In the UV editor, you’ll now see the unwrapped version of your object. You have the option of selecting vertices, edges, faces, or UV islands by clicking on the “Vertex Selection Mode” icons on the left side of the Header just below the Topbar.
Step 4: Final Touches
With the image textures precisely where you want them, it’s time to render your textured cube. Rendering shows us what our final textured object will look like. To render, you should first select a suitable render engine.
Blender 3.0 provides three options: Eevee, Workbench, and Cycles (outlined in yellow in the screenshot above). The Workbench engine is what remains of the original Blender render engine and is not recommended for final renders. That leaves you with either Eevee or Cycles. A few key differences include the following:
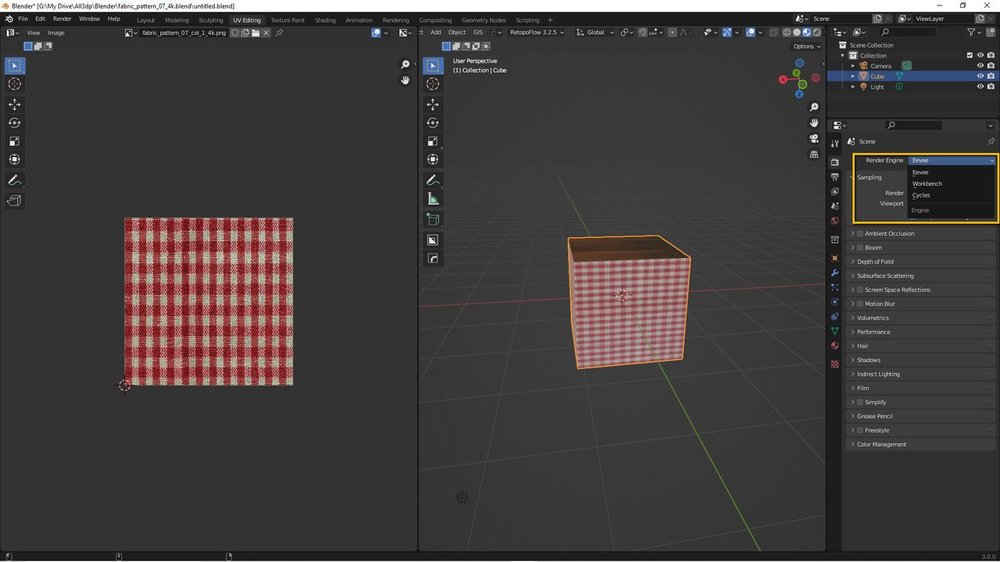
Eevee is faster.
Cycles allows for more photo-realism.
Eevee needs tweaking for transparency and shadows to render properly.
We recommend Eevee for stylistic renders and Cycles for realistic renders.
To finish up, simply press the “F12” key to render your cube.

Maya: Mastering Skills Fast II
Technology is the foundation, the guarantee of artistic play, just as we build a building, the basic building is the foundation, and the interior decoration is the space for artistic play. So learning Maya is one of the necessary skills of modelers, technical professionals influence the creative process of art.


Post a Comment
要发表评论,您必须先登录。
Pingback: How to Add Textures in Blender3.0 | art design ...
2022-03-31