What is 3D Coat?
3D Coat is a sculpting and texturing package often likened to ZBrush or Mudbox. Though it is similar to these programs, it also has a lot of unique features, like it’s UV unwrapping tools.
The big difference that separates 3D Coat from other sculpting programs is that instead of using polygonal meshes it uses voxels.Voxels are like a 3D equivalent of pixels.
It produces a virtual grid in 3D space and the mesh then occupies sections of this grid to form its shape. The word voxel come from combining the term pixel with volume. Low resolution voxels are a common art style in video games, for example Minecraft or Roblox.
While voxels are based on cubes, the high resolution of the grids means smooth curves are still possible. Similar to how polygonal meshes are flat planes that can make smooth curves by having a high number of polygons and using smoothing groups.
Since the mesh in 3D Coat uses voxels, you do not need to subdivide polygons which can give you better performance on some PC setups. The other benefit is that your 3D object is solid and isn’t just a shell like a polygonal mesh. This makes some sculpting and deformation techniques easier, both computationally and creatively for the artist.
What is 3D Coat Used For?
3D Coat primarily markets itself as a texturing and sculpting program.
Its sculpting tools behave similarly to other programs, however there are no topology restraints in 3D Coat that you may face in other programs. This is due to its voxel based workflow.
It comes with dozens of brushes built-in to aid all of your 3D projects, all with the ability to add more brushes based on whatever you need. There’s a nice long list of brushes on their website to check out.
When you’ve finished your sculpt in 3D Coat you then have the option to export it directly for 3D printing using their wizard. This makes 3D Coat an excellent choice for aspiring 3D printers.
Due to voxels making a solid model similar to that in CAD software it’s much easier to convert it to a format 3D printers understand. It’s a useful feature if you want to print off small models of your sculpts.
3D Coat also allows you to texture your mesh. You can create textures up to 16k resolution using their large selection of pre-set brushes and materials. It also uses a PBR material workflow which means it’s compatible with most other 3D programs and game engines.
Similar to Substance Painter, with 3D Coat you can calculate and bake ambient occlusion and curvature maps from your mesh and then use this with smart materials. These materials can do things like add areas of worn paint and rust onto corners of you model where those signs of wear are more common.
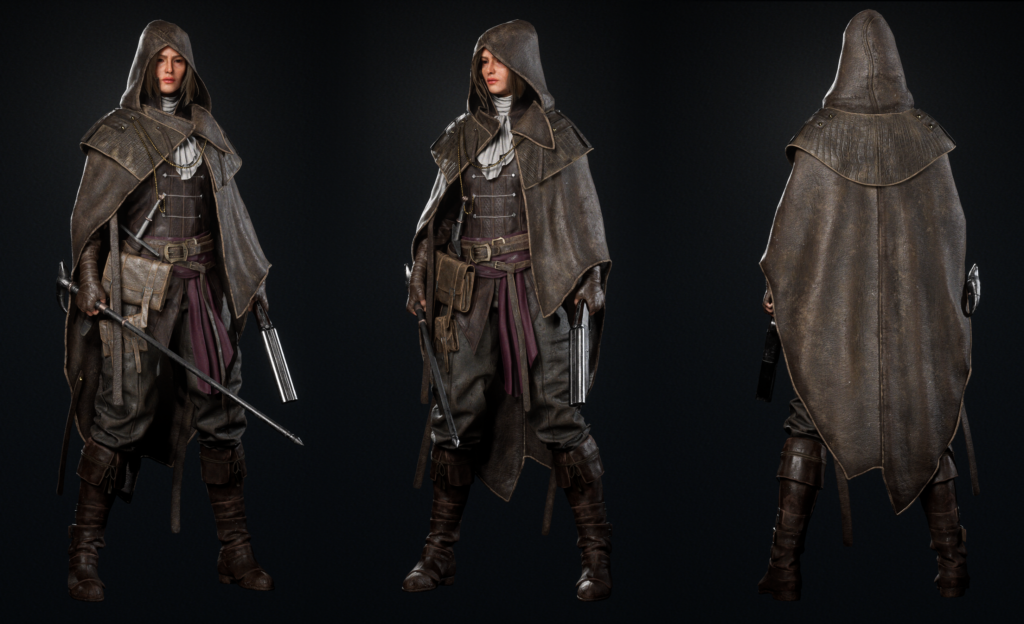
It will do this automatically, but you can then use its mask and layer options to add and remove little areas to suit your fancy.
UV unwrapping is where most artists agree this package really shines.
UV mapping can be a tedious task, but the tools in 3D coat make it much easier. It uses a “Global Uniform” algorithm to give you clean spread UV maps.
You can target individual parts of the model and edit them separately if they haven’t quite gone as planned. I strongly recommend looking into this portion of the software since it can really speed up your workflow as you can import models from other programs like 3ds Max or Maya.
Also note that 3D Coat also has powerful tools for retopology. It has an automatic retopologising tool that uses edge loops that you define to generate the poly mesh.
If you’ve made a low poly mesh in a modelling program before moving it to 3D Coat for sculpting and texturing, you can then import that low poly model. From there the geometry of that low poly model will be used as a base for the retopology of the voxel mesh. Pretty cool!
By using Applinks you can quickly and easily move your models and textures between different programs. Applinks need to be downloaded separately and they’re all on the 3D Coat site.
3D Coat primarily markets itself as a texturing and sculpting program.
Its sculpting tools behave similarly to other programs, however there are no topology restraints in 3D Coat that you may face in other programs. This is due to its voxel based workflow.
It comes with dozens of brushes built-in to aid all of your 3D projects, all with the ability to add more brushes based on whatever you need. There’s a nice long list of brushes on their website to check out.
When you’ve finished your sculpt in 3D Coat you then have the option to export it directly for 3D printing using their wizard. This makes 3D Coat an excellent choice for aspiring 3D printers.
Due to voxels making a solid model similar to that in CAD software it’s much easier to convert it to a format 3D printers understand. It’s a useful feature if you want to print off small models of your sculpts.
3D Coat also allows you to texture your mesh. You can create textures up to 16k resolution using their large selection of pre-set brushes and materials. It also uses a PBR material workflow which means it’s compatible with most other 3D programs and game engines.
Similar to Substance Painter, with 3D Coat you can calculate and bake ambient occlusion and curvature maps from your mesh and then use this with smart materials. These materials can do things like add areas of worn paint and rust onto corners of you model where those signs of wear are more common.
It will do this automatically, but you can then use its mask and layer options to add and remove little areas to suit your fancy.
UV unwrapping is where most artists agree this package really shines.
UV mapping can be a tedious task, but the tools in 3D coat make it much easier. It uses a “Global Uniform” algorithm to give you clean spread UV maps.
You can target individual parts of the model and edit them separately if they haven’t quite gone as planned. I strongly recommend looking into this portion of the software since it can really speed up your workflow as you can import models from other programs like 3ds Max or Maya.
Also note that 3D Coat also has powerful tools for retopology. It has an automatic retopologising tool that uses edge loops that you define to generate the poly mesh.
If you’ve made a low poly mesh in a modelling program before moving it to 3D Coat for sculpting and texturing, you can then import that low poly model. From there the geometry of that low poly model will be used as a base for the retopology of the voxel mesh. Pretty cool!
By using Applinks you can quickly and easily move your models and textures between different programs. Applinks need to be downloaded separately and they’re all on the 3D Coat site.
Downsides of 3D Coat?
This is a very good piece of 3D software, but it has a couple of downsides that are worth mentioning.
Firstly its tools for modelling are very limiting. You are much better using a dedicated polygonal modelling program for this task, like 3ds Max or Blender.
Its shaders are also bare bones. This is where software like Substance Painter can work better, especially for more complicated materials that react dynamically to the environment.
It also has no options for baking lighting into your textures, which is something you usually do not want from a PBR workflow anyway. If that is something you’re looking for you can use Marmoset Toolbag or the light baking options in a real-time engine like Unity or Unreal Engine.
The last thing to mention in this section is it’s not as widely recognized by the industry as something like ZBrush. This means that only learning 3D Coat may limit your job prospects. Also the community support is smaller compared to other sculpting tools.
However they have a lot of useful tutorials created by the company itself to get you started.
But all that said, this program does have the major benefit of a very low retail price. If you are only using it for personal projects the price is only $99, then moving up to $379 for professional projects.

The licence is permanent and only charges a one-time fee unlike many modern subscription models. Also it can be upgraded from the amateur to the professional package for only $280 so it’s really a great choice for newer 3D artists looking for a cheap-yet-powerful sculpting tool.
Who Uses 3D Coat?
3D Coat isn’t as big in the industry as a lot of the big 3D programs we all know & love. But that doesn’t mean it hasn’t found a place in some prominent companies.
The UK based company Jagex who are most known for their MMORPG Runescape use 3D Coat in their workflow.
Another user is the US company Zenimax Media, parent company of Bethesda who makes the Fallout and Elder Scrolls games. So you will find a few large game developers who rely on 3D Coat in their workflows(which means it’s not just a tool for personal projects!)
It is a very useful tool to have in your toolbox, and really a great tool for any 3D artist to study even a little bit.
Highly recommend checking it out; a free 30 day demo is available if you want to give it a go.
Things You Need to Know about 3D Rigging
As with other CGI techniques, 3D rigging can be confusing to the uninitiated. This guide aims to break it down so that every artist can learn how to rig a 3D model.
Post a Comment
要发表评论,您必须先登录。
