5 Steps to Create a Digital Illustration with Procreate
This is an article written specifically for newcomers to drawing. If you are a drawing novice, but like drawing very much, I suggest to start with the simplest digital illustration, because illustration does not require very high art foundation. Digital painting requires tools.
If you use computer software to draw, there are still certain requirements for software operation and familiarity, such as remembering shortcut keys. Procreate is one of the most basic drawing software, it is powerful and smooth, and has many auxiliary functions that make drawing much easier.
You can use Procreate to draw digital illustrations, which is very professional and powerful software. It basically has all the features you want, brushes, layers, adjusting brush size, transparency, and adjusting color gradations, etc. It supports a lot of gestures, such as two-finger touch to undo, four-finger touch to bring up the multitasking window, where the usual tasks can also be set.
The interface is simple and easy to use, and the new features are more pointing, quick to make good results, and intuitive and simple application operations. Also you can carry it around with you, you can draw it anytime, anywhere, very convenient, and Apple comes with a screen color does not need you to worry about.
Back to drawing digital illustrations, you can find illustration video tutorials to follow step by step at first. When you are familiar with the software, then find your favorite illustration works to copy. If you want to go deeper into the painting and then to understand the basics of art, such as light and shadow, perspective, human structure, etc..
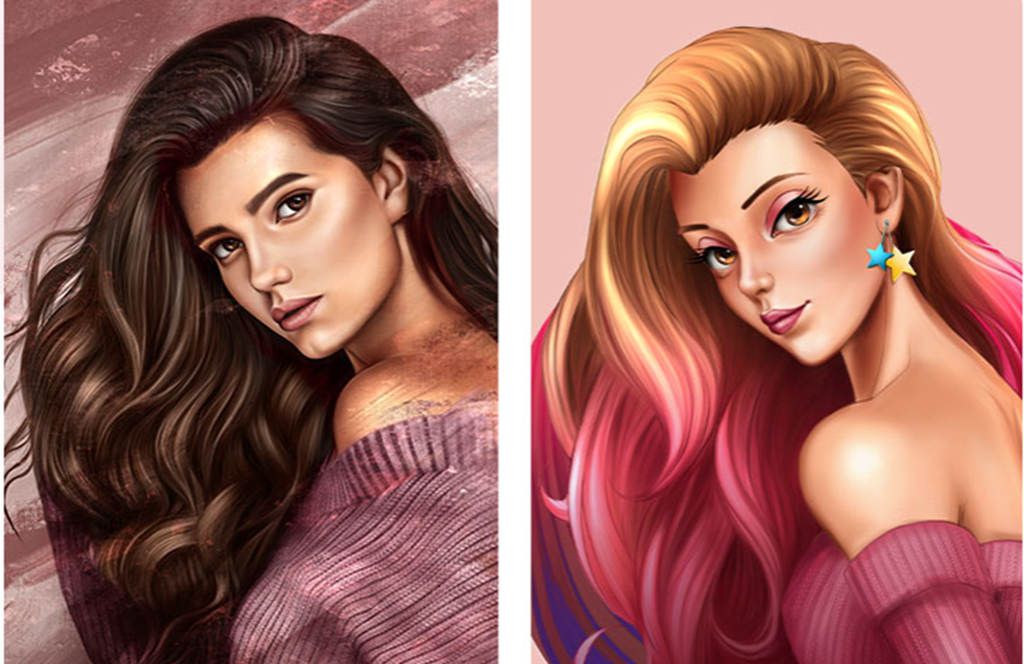
Here is a particularly thoughtful tutorial recommended for you. In this tutorial, the instructor will show two different styles of digital illustration. In this tutorial, you will learn how to use Procreate to draw realistic characters from scratch and then create cartoon style illustrations. You will learn the basic use of Procreate, drawing techniques for realistic and cartoon characters, drafting, coloring and drawing backgrounds.
- Double Case, Multiple Styles
The lecturer not only teaches you how to draw 2D characters in realistic style, but also teaches you how to draw 2D characters in cartoon style quickly.
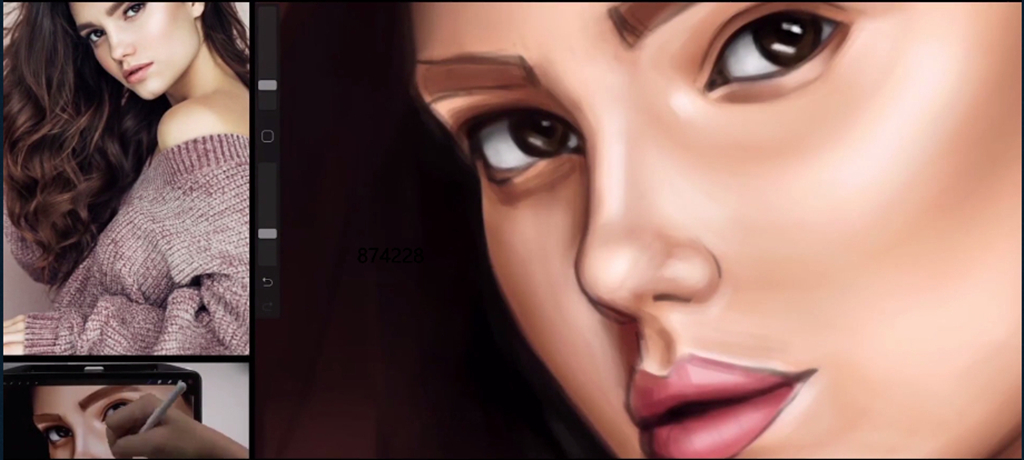
- Split Screen Display
You can not only see the drawing process on the screen, but also the real-time operating table of the instructor. You can learn the instructor’s drawing digital illustration gestures and software operation, which makes it easier to get started.
- Full flow, newbie friendly
No matter you have the basic knowledge of drawing or not, you can learn this tutorial. The teacher will teach the painting process and techniques step by step, so you don’t need to worry about not being able to master it.
Here are 5 processes for drawing digital illustrations in Procreate, which you should read carefully.
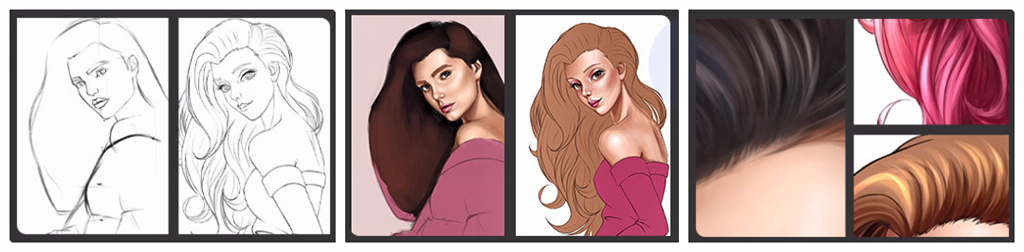
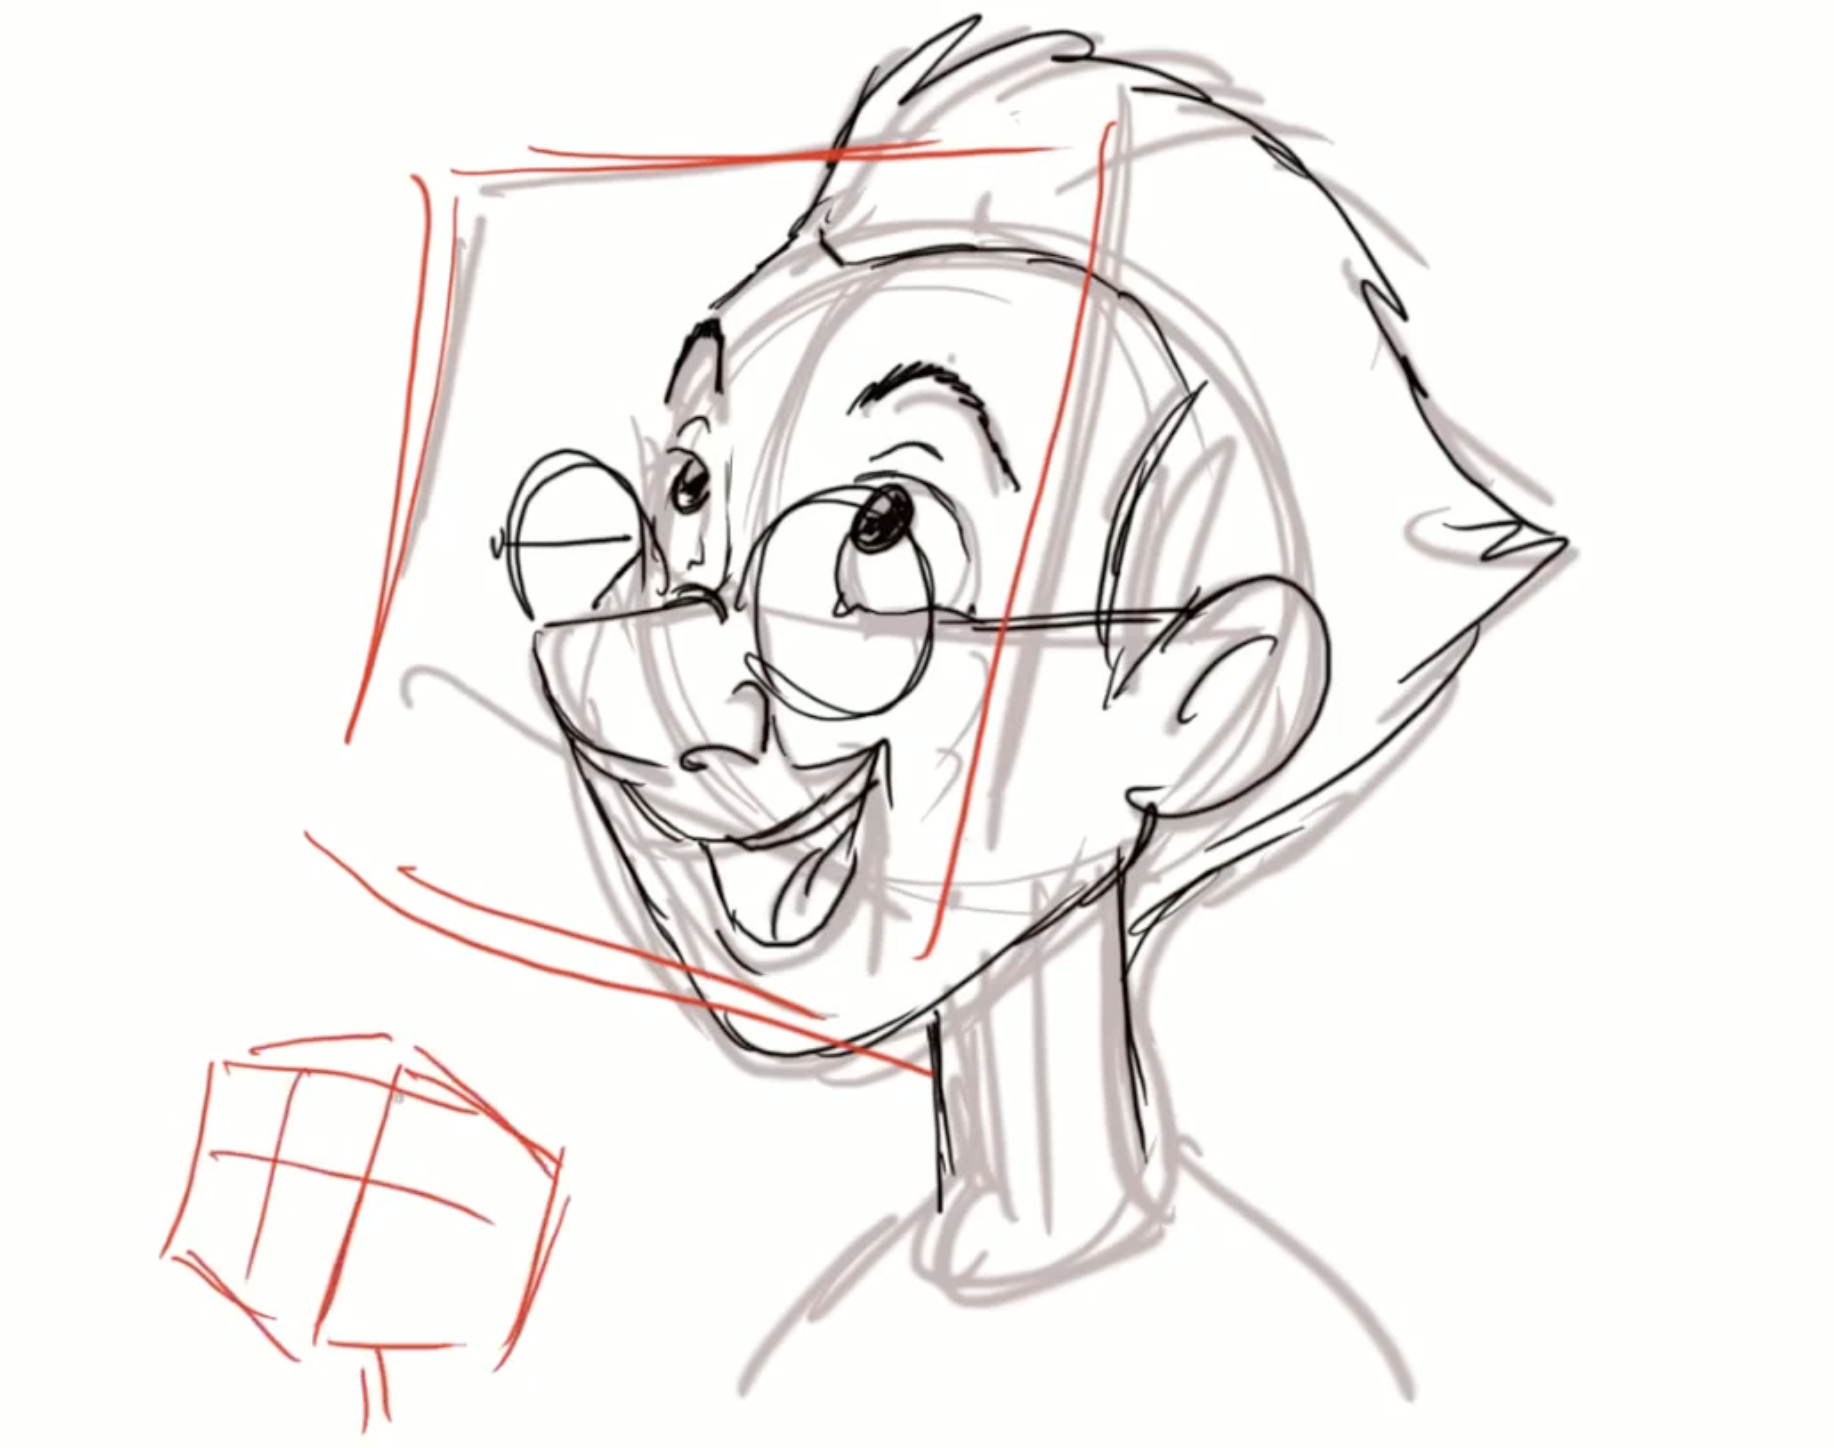
Sketching
First, the instructor will carefully start with a sketch, outlining the proportions of the features and the upper body according to the reference drawing. During this process, the lecturer will explain each step while drawing, and you will learn more about how to operate Procreate. In addition, the instructor will explain in depth how to make the character’s features more three-dimensional in the sketching stage.
Coloring
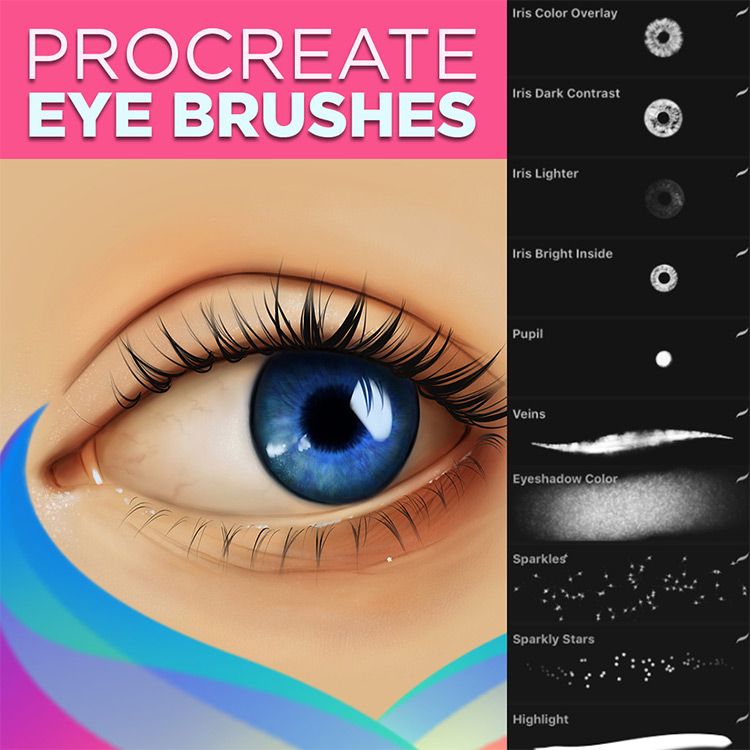
When the sketch is complete, the teacher will do the initial coloring. It is recommended to create a new layer for each color. If you are not satisfied with the color you put on later, you can go back and change it, which is also more convenient. After the coloring, you need to add some details to your work to enrich the digital illustration. Determine the approximate distribution of highlights and shadows.
Adding layers of detail
Next, you have to further refine the five senses and finely draw the texture of the hair and sweater. I believe there are many people who will be overwhelmed by this step , and cannot draw realistic hair details. Because hair drawing is very tedious and requires patience for a process. You do not have to worry, the instructor will focus on dissecting the hair drawing process, so that you can master the hair drawing skills and not be afraid of poor hair drawing in the future. At the same time, the instructor will show how to use different brushes appropriately in different places to add realism.
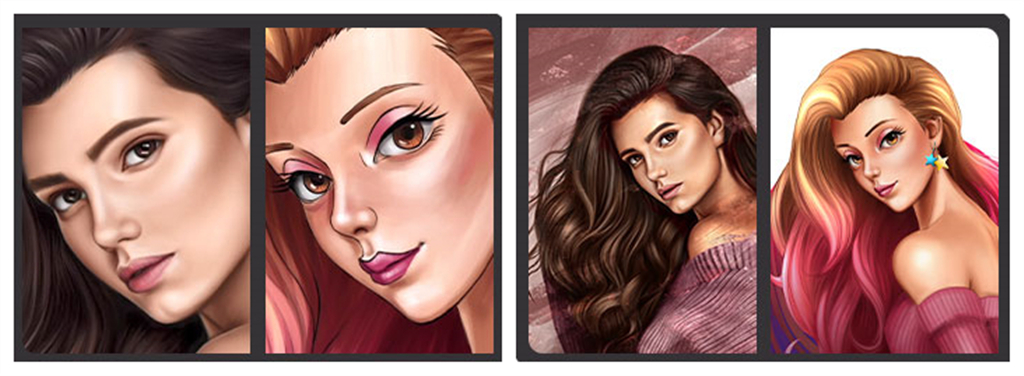
Light and shadows
At this stage, you will add shadows to your work. It shows a certain atmosphere in the painting, which is very important for the picture. You can use the changes of light and shade to achieve a more dimensional and realistic effect. Use additional light when you want a soft glow. When you want to express strong light, use the effect of avoiding light.
Finalization of digital illustration
Finally, you need to draw the background and reflective areas to enhance the overall finish of the picture.
Of course, learning digital illustration can’t be done overnight, you need a lot of practice and reflection. Let’s join the course from now on and learn. If you buy now, you can get a 10% discount.
Coupon code ↓↓↓↓
blog10
You need to copy and paste the above coupon code into the “Apply Coupon” and click “Enter” button. Welcome to Wingfox , where you can get various tips of art composition you want.
More related article about illustration: His Card Illustrations Are “Work of Art” And Could Be Simply Done with PS!


Post a Comment
要发表评论,您必须先登录。
Pingback: Collection: A list of 6 Procreate tutorials in Wingfox - Wingfox
2021-12-31